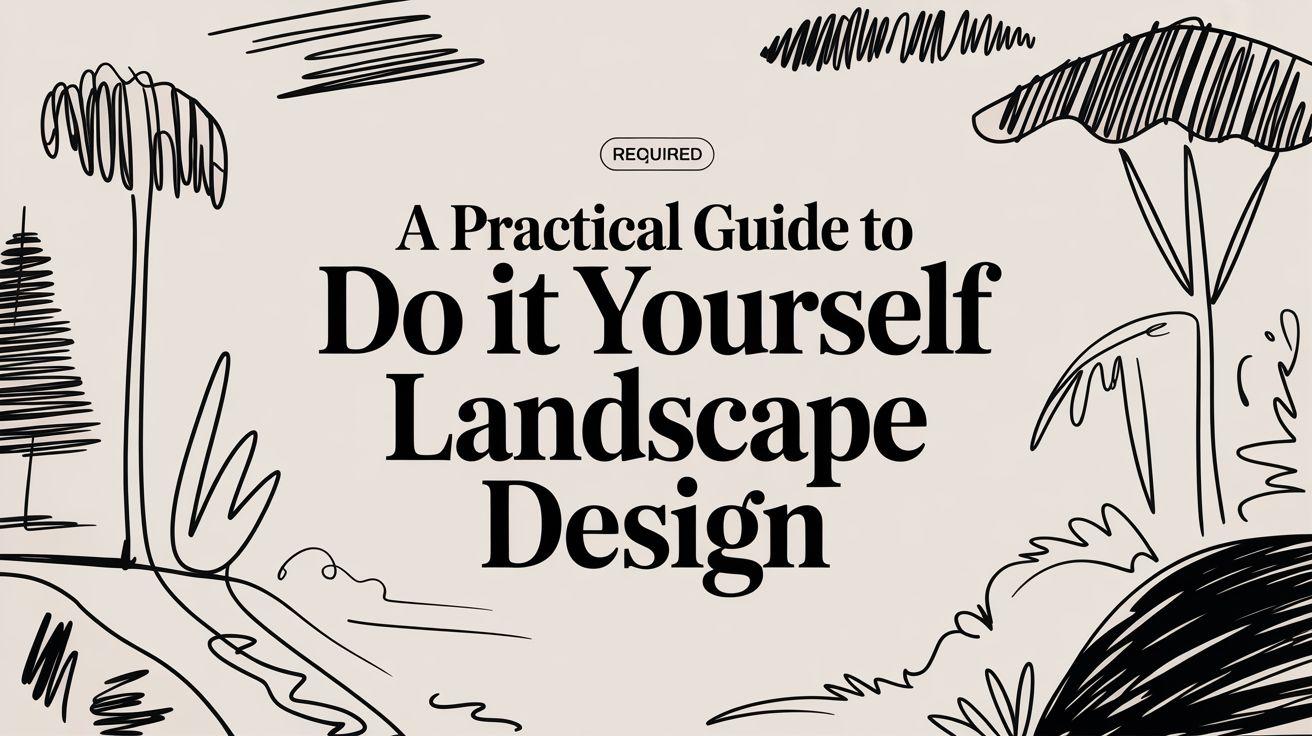
A Practical Guide to Do It Yourself Landscape Design
Standing in your yard and seeing nothing but a blank canvas can feel a little daunting. But here's the secret: creating a beautiful outdoor space has less to do with some innate 'green thumb' and everything to do with a good plan. This guide is built on years of experience, designed to walk you through that process one step at a time.
Why Do It Yourself Landscape Design Is Exploding in Popularity
Taking on your own landscape design isn't the monumental task it used to be. The days of needing to hire an expensive consultant for a polished, professional look are behind us. More and more, homeowners are rolling up their sleeves and discovering the satisfaction of creating a space that’s truly their own. It’s a fantastic way to boost your home’s curb appeal and forge a real connection with your property.
This hands-on approach is getting a huge lift from technology. The global market for Landscape and Garden Design Software reached USD 5,261.5 million in 2026 and is still climbing. That number isn't just business jargon; it reflects a real shift where people are using digital tools to bring their visions to life before ever picking up a shovel.
Breaking Down The Process
I've found that the best way to tackle any big project is to break it into smaller, manageable phases. For landscape design, it really boils down to three simple stages: coming up with the Idea, creating the Plan, and finally, the Build.
Thinking about it this way keeps the whole thing from feeling overwhelming.

This framework takes the mystery out of the process, making it much more approachable for anyone ready to get their hands dirty.
What You'll Learn in This Guide
We're going to move through each critical part of the project together, giving you the confidence to build a landscape you’ll love for years to come. We’ll cover all the essentials:
- Assessing Your Property: We'll start by learning to read your land—from sun patterns and drainage to the kind of soil you're working with.
- Setting Clear Goals: You need to define what you want your yard to do. Is it a quiet retreat? A space for summer barbecues? A playground for the kids?
- Choosing a Style: We'll explore different aesthetics to find one that fits your home's architecture and your personal taste.
- Creating a Plan: This is where we go from a rough idea to a scaled drawing, mapping out "outdoor rooms" and deciding on focal points.
- Selecting Plants and Materials: I'll share tips for choosing beautiful, hardy plants and materials that are right for your climate and will stand the test of time.
Part of any smart DIY project is knowing which jobs are for you and which are best left to a pro. This article on DIY vs Professional Foundation Installation offers great perspective on making that call, especially for bigger structural elements. By following a clear, structured approach, you’ll be well on your way to a fantastic result.
Laying the Groundwork: Site Analysis and Project Goals
Every great landscape starts long before you ever pick up a shovel. It begins with a bit of detective work. Getting to know your property is the single most important thing you can do to ensure your project is a success, not a source of frustration.
Think of it this way: you wouldn't build a house without a solid foundation. In landscaping, that foundation is a deep understanding of your site and a clear vision for what you want to achieve. Let's dig in.
Get to Know Your Canvas: The Site Analysis
Before you start dreaming of specific plants or patio furniture, you have to get familiar with the land you're working with. This means grabbing a notepad (or your favorite tablet app) and walking your property with a critical eye.
This isn't just about measuring the space. It’s about understanding the unique environment—the good, the bad, and the soggy. Pay close attention to these critical factors:
- Sun & Shade: Where does the sun fall throughout the day? Make a note of which spots get blazing afternoon sun versus gentle morning light. An area that’s sunny and perfect for tomatoes at 9 AM might be in deep shade by 3 PM, making it a better home for hostas.
- Water & Drainage: After the next big rain, go outside and see what happens. Where do puddles form and linger? Where does water rush away? Knowing your soggy spots and dry zones is crucial for plant survival.
- Soil Type: Is your soil heavy clay, sandy, or a rich loam? You don't need a fancy lab test; a simple "jar test" can tell you a lot. Understanding your soil helps you choose the right plants and know what amendments, like compost, you might need to add.
- Existing Features: Map out everything that’s already there—your house, driveway, mature trees you want to keep, sheds, underground utility lines, and any slopes or hills. These are the fixed elements your design will have to work around.
I can't stress this enough: find your USDA Plant Hardiness Zone. This simple number dictates which perennial plants will survive winter in your area. You might also find little "microclimates" in your yard—like a warm, protected corner by the house or a windy, exposed patch—that open up unique planting possibilities.
Defining Your "Why" and Your Budget
Once you have a handle on the physical characteristics of your yard, it’s time to think about how you want to use it. A beautiful garden is nice, but a garden that’s both beautiful and perfectly suited to your lifestyle is a home run.
Your goals will steer every single decision you make from here on out. For example, a landscape designed for a family with young kids will look completely different from a quiet, meditative retreat for two.
Set Clear, Actionable Goals
So, what do you see yourself doing in this new outdoor space? Try to picture it. Are you hoping for:
- A durable lawn and play space for kids and pets?
- A large patio and outdoor kitchen for entertaining?
- A quiet escape with a water feature and cozy seating?
- A series of raised beds for a productive vegetable garden?
Defining these activities upfront keeps you focused. It's the difference between creating a yard you just look at from the window and one you actually live in.
Now for the part everyone dreads: the budget. Talking about money can feel restrictive, but setting a budget is actually one of the most empowering things you can do. It forces you to be creative and decide what’s truly important.
Start with a realistic total number, then begin to break it down. Having a plan prevents that classic mistake of spending your entire budget on a stunning stone patio, only to have nothing left for the plants that would soften its edges.
A budget is a personal thing, but a sample breakdown can help you see how the pieces might fit together.
Sample DIY Landscape Budget Allocation
Here’s a look at how you might allocate your funds. Remember, this is just a starting point—adjust the percentages based on your own project priorities.
| Project Component | Budget Allocation (%) | Key Considerations |
|---|---|---|
| Hardscaping | 30-40% | Patios, walkways, walls. This is often the biggest upfront cost. |
| Plants & Trees | 25-35% | Invest in a few mature trees for instant impact; fill in with smaller shrubs/perennials. |
| Soil & Amendments | 10-15% | Don't skimp here! Good soil is the foundation for healthy plants. |
| Irrigation/Lighting | 10-15% | Can be phased in, but plan for it from the start. |
| Contingency Fund | 10-15% | Always set aside a buffer for unexpected costs or great finds. |
If your dream is an elaborate outdoor kitchen, your hardscaping percentage will naturally be higher. If you're envisioning a lush, flower-filled cottage garden, you’ll shift more of your budget toward plants. This essential prep work—analyzing your site, defining your goals, and setting a budget—is what separates a successful DIY project from a chaotic and expensive one.
With your site analysis in the bag, you can now dive into the fun part: bringing your vision to life. This is where you get to be creative, blending what your property needs with what you truly love to look at. It's about designing a space that feels like a genuine extension of your home.
The trick is to find a landscape style that really sings with your home's architecture. Think about it—a sleek, minimalist Modern design looks stunning next to a contemporary house, just as a lush, free-flowing Cottage garden feels perfect for a classic bungalow. And if you're in a drier climate, a water-wise Xeriscape with its native plants and striking forms is both beautiful and practical.
Finding Your Vibe with a Mood Board
Before you even think about sketching a layout, start collecting inspiration. The absolute best way I've found to do this is with a mood board. You can go old-school with a physical corkboard and magazine clippings or create a digital one on a platform like Pinterest. The beauty of a mood board is that it’s all about exploration—no pressure, no final decisions.
As you pin and post, you'll start to see patterns emerge. Are you saving photos with sharp, clean lines, or are you drawn to wild, overflowing flower beds? Just grab anything that catches your eye.
- Plants You Love: Don't get hung up on names yet. Just save images of plant shapes, textures, and colors that speak to you.
- Hardscape Materials: Collect pictures of patios, walkways, and retaining walls. Do you find yourself drawn to dark slate, warm flagstone, or bright, crunchy gravel?
- The Overall Feeling: Save images that just feel right. Whether it's serene and meditative, buzzing with energy, or cozy and rustic, capture that vibe.
This simple exercise is a game-changer for any do it yourself landscape design project. It gives you a solid visual compass to guide you before you start making more permanent choices.
From Inspiration to a Scaled Plan
Once your mood board has helped you nail down a style, it's time to get tangible. This means creating a scaled drawing of your yard. Don't let that term scare you. It can be as simple as using graph paper where one square equals one square foot.
Start by drawing your base map from the site analysis—your house footprint, property lines, and any features you're keeping, like that big oak tree or the existing driveway. From there, you can start carving out your "outdoor rooms." I always tell people to think of their yard like another level of their home's floor plan.
These "rooms" are just zones for the activities you want to do outside. You might sketch a rectangle for a dining patio, a soft curve for a fire pit lounge, or an organic blob for a kids' play area.
The image below shows how modern AI tools can help you visualize these different styles on your actual home almost instantly. This is a fantastic way to "try on" a look before committing.

Seeing how a Modern, Cottage, or Xeriscape design really looks on your property is incredibly powerful. It helps you confirm the ideas from your mood board before you pick up a shovel.
Connecting the Dots with Pathways and Focal Points
With your outdoor rooms blocked out, the next step is to figure out how to move between them. Pathways do more than just provide a walking surface; they direct the eye and choreograph the experience of moving through your garden. A straight, direct path creates a sense of formality, while a gently meandering one invites a leisurely stroll and a sense of discovery.
As you map out these paths, start thinking about creating focal points. A focal point is simply a standout element that immediately draws attention and anchors a design. It gives your eye a place to land and adds a much-needed layer of interest.
A well-placed focal point is one of the fastest ways to make a DIY design feel professionally planned. It creates intention and structure, preventing the yard from feeling like a random collection of plants.
A focal point can be almost anything that commands attention:
- A specimen tree with interesting bark or a unique shape, like a 'Desert Museum' Palo Verde.
- A striking piece of sculpture or an oversized, colorful pot.
- A functional feature that’s also beautiful, like a fire pit or a bubbling fountain.
- An architectural element, such as an arbor framing a view or a pergola defining a seating area.
Position these key pieces strategically—at the end of a long path, in the center of a view from your kitchen window, or as the centerpiece of your patio.
This whole process of mapping and planning is made much easier with modern tools. If you're curious, check out our guide on the best landscape design software for homeowners to see what's out there. The DIY landscape movement is a huge part of why the landscaping services industry is projected to grow from USD 298.5 billion in 2026 to USD 514.7 billion by 2034. Homeowners are now empowered with accessible apps that generate climate-specific, photorealistic designs, allowing them to skip expensive consultations and save thousands. This shift is a perfect example of how technology is giving people more control over their own homes.
Alright, this is the fun part. You've done the homework—analyzing your site, setting goals, and picking a style. Now it's time to bring that vision to life by choosing the plants and materials that will become your new landscape.
This is where a paper plan starts to feel real. It's about more than just picking pretty flowers; it's about selecting elements that will thrive in your yard and look fantastic for years to come. Think of it as casting the characters for your garden's story.

The "Right Plant, Right Place" Golden Rule
If you remember one thing from this guide, let it be this: right plant, right place. I’ve seen more garden dreams dashed by ignoring this simple principle than by any other mistake. It’s the absolute key to a successful do it yourself landscape design.
When you fight a plant's natural tendencies, you're signing up for a constant battle. A sun-loving lavender will never be happy in the deep shade behind your house, and a fern that craves moisture will wither in a hot, dry patch of dirt. Your site analysis from earlier is your cheat sheet—use it!
Fortunately, finding the perfect plants has never been easier. The landscaping products sector is booming, expected to jump from USD 88.64 billion in 2026 to a massive USD 129.98 billion by 2030. This explosion means you have incredible access to climate-appropriate plants, better tools, and apps that let you see exactly how a plant will look before you spend a dime.
Thinking Beyond Just Sun and Water
While light and water are your starting point, a few other details make all the difference between a good garden and a great one.
- Plan for a Plant's Adult Size: This is the most common rookie mistake. That adorable little shrub in its one-gallon pot might look perfect now, but its tag says it will grow to be 8 feet tall and wide. Always plan for the mature size to avoid an overcrowded jungle that requires constant, aggressive pruning down the road.
- Create Year-Round Beauty: Your garden shouldn't just peak for a few weeks in summer. When you’re choosing plants, think about what they offer in every season. Look for a mix of spring blooms, lush summer foliage, vibrant fall colors, and strong winter shapes (like evergreens or ornamental grasses).
- Layer for a Rich, Full Look: To give your garden depth and structure, you need to layer. Use taller trees for the backdrop, shrubs for the middle ground, perennials for pops of color, and low-growing groundcovers to fill in the spaces. This prevents your landscape from looking flat and one-dimensional.
Wondering what works best for the most visible part of your property? We've put together some great ideas in our guide on the best plants for your front yard landscaping.
Building the Bones with Hardscaping
A great garden isn't just about the plants. The hardscaping—patios, paths, walls, and decks—forms the "bones" of your design. These are the permanent structures that define your outdoor rooms and provide function and beauty all year long.
Choosing these materials is a balancing act between the look you want, how much you want to spend, and how durable they need to be. For instance, when designing a deck or raised patio, a guide on choosing balustrades for patios can be a lifesaver, helping you nail both the style and safety requirements.
Here’s a quick look at some popular choices for patios and walkways:
| Material | Cost | Durability | Aesthetic |
|---|---|---|---|
| Concrete Pavers | Moderate | High | Uniform, available in many shapes and colors. |
| Natural Flagstone | High | Very High | Irregular shapes, natural and rustic look. |
| Decomposed Granite | Low | Low-Moderate | Informal, permeable, soft and crunchy texture. |
| Brick | Moderate-High | High | Classic, timeless look with geometric patterns. |
Let your chosen style guide you. A sleek, modern design works perfectly with large-format concrete pavers, while a cozy cottage garden practically begs for the organic, irregular shapes of natural flagstone.
Think of your hardscape as a long-term investment. While materials like gravel are budget-friendly upfront, pavers or flagstone often offer better longevity and a more permanent, high-value feel to your outdoor living areas.
The same logic applies to retaining walls and garden edging. You can choose from natural stone, wood timbers, or easy-to-install manufactured blocks. Always consider the upfront cost against the material's lifespan and the maintenance it will need. Getting this right ensures your do it yourself landscape design is built to last.
Bringing Your Design to Life with Phased Implementation
Okay, you’ve got a killer design on paper. Now for the fun (and dirty) part: making your do it yourself landscape design a reality. The secret to getting from paper to soil without feeling completely overwhelmed is to break the project down into smaller, manageable phases. This approach is not only easier on your back, but it's also a lot kinder to your wallet.

I always tell people to think of it like building a house—you pour the foundation before you frame the walls. Landscaping follows the same logic. Getting the order of operations right from the start saves you from costly and frustrating rework down the road.
The Smart Way to Sequence Your Project
Efficiency is everything. You don't want to install beautiful new perennials only to have them trampled when the crew comes to build your stone patio. I’ve seen it happen, and it’s painful. Following a proven sequence is non-negotiable.
First, you need a clean slate. This means clearing the site of any unwanted plants, tearing out the old lawn, and hauling away debris. If you're removing a lot of grass, renting a sod cutter is a game-changer and well worth the small expense.
With the site cleared, you can tackle any rough grading or major earthwork. This is your chance to solve drainage problems, build up planting berms, or create a level base for a patio.
Now, you can bring in the "bones" of your landscape.
- Hardscaping Comes First: This is all the heavy, messy stuff. Build your patios, lay your walkways, and install any retaining walls, decks, or pergolas. It's much easier to work when the site is open and you don’t have to worry about damaging new plants.
- Run Your Utility Lines: If you’re planning on an irrigation system or landscape lighting, now’s the time to dig the trenches and lay the pipes and wires. Trying to do this after planting is a surefire way to slice through precious root systems.
- Prep and Amend the Soil: Once the heavy construction is done, you can focus on the soil. Bring in quality topsoil and work compost or other organic matter into your planting beds. Healthy soil is the single most important factor for a thriving garden, so don't cut corners here.
Only after these foundational steps are complete should you even think about buying plants.
Planting: Go from Big to Small
With your hardscape installed and your soil ready to go, it's time for the greenery. The golden rule is to plant from the largest elements down to the smallest. This simple method helps you get the spacing right and protects delicate smaller plants from getting squashed.
Here’s the planting sequence I always follow:
- Trees: They are the structural backbone of the garden and the most permanent fixtures, so they always go in first.
- Shrubs: Next, place your shrubs. They create the garden's middle layer, adding substance and defining spaces.
- Perennials and Grasses: Use these to fill in around the larger plants. They’ll provide the bulk of your garden's color, texture, and seasonal drama.
- Groundcovers and Annuals: These are the finishing touches. Tuck them into any remaining gaps for a lush, full look or a pop of quick color.
- Mulch Everything: After all the plants are in, spread a 2-3 inch layer of mulch over the soil. It ties the whole look together, keeps weeds down, and helps the ground retain moisture.
Phasing isn’t just about the order of work; it's a powerful budgeting strategy. Spreading the project out over several seasons makes it far more affordable. You could tackle the hardscaping in year one, add trees and shrubs in year two, and fill in with perennials the following year.
Beyond the Build: Planning for Long-Term Success
Your job isn't done when the last plant goes in the ground. A garden is a living, breathing thing that needs consistent care to mature and look its best. Creating a simple maintenance plan from day one is the best way to protect your investment of time and money.
New plantings are especially thirsty. Their root systems aren't established yet, so they can dry out quickly. For the first few weeks, make a habit of checking the soil every couple of days.
A basic maintenance calendar can be a real lifesaver. Jot down the key tasks for each season.
| Season | Key Maintenance Tasks |
|---|---|
| Spring | Cut back last year's growth on grasses and perennials. Top up mulch and fertilize where needed. |
| Summer | Stay on top of watering, especially during heatwaves. Deadhead spent flowers to encourage more blooms. |
| Fall | Rake leaves, plant spring-blooming bulbs, and give everything a good, deep watering before winter. |
| Winter | Protect any tender plants from the cold. This is also the perfect time to plan next year's additions! |
If your budget is tight, breaking the project into phases is the perfect solution. To help you prioritize your spending, you might want to check out our guide on budget landscaping ideas. Thoughtful planning at every stage ensures your do it yourself landscape design doesn’t just survive—it gets more beautiful with every passing year.
Common Questions About DIY Landscape Design
It’s completely normal to have a ton of questions when you’re taking on a **do it yourself landscape design**. You're making big decisions that will define your home's look and feel for years to come. Let's tackle some of the most common hurdles I see homeowners face, with clear, practical advice.What Is the Biggest Mistake to Avoid in DIY Landscape Design?
Without a doubt, the single biggest—and most expensive—mistake is skipping the planning phase. I’ve seen it happen time and time again: a homeowner gets a burst of inspiration, heads straight to the nursery, and starts buying plants they like. This almost always leads to a jumbled, chaotic yard, plants dying because they're in the wrong conditions, and a whole lot of wasted money.
Every great landscape starts with the "boring" stuff: a solid site analysis, clear goals, a style you've committed to, and a plan drawn to scale. Putting in that upfront work is what ensures every dollar you spend and every plant you buy has a purpose.
The impulse buy at the garden center is the biggest budget-wrecker in DIY landscaping. A beautiful plant in the wrong place is a waste of money, no matter how good the sale was. Stick to your plan.
How Can I Make My DIY Design Look Professional on a Tight Budget?
Getting that high-end, polished look doesn't actually require a massive budget. It's all about being smart with your resources and focusing on structure and impact.
- Create Strong Lines: First things first, define your garden beds and pathways with crisp, clean lines. This is a classic designer trick that immediately creates a sense of order and intention. A clean edge just looks professional, and it doesn't cost much to do.
- Invest in High-Impact Elements: Instead of spreading your budget thin on lots of small, cheap decor, put it toward one or two standout features. Think about a single gorgeous specimen tree, like a Japanese Maple, or a pair of large, modern planters flanking your front door. One great piece makes a far bigger statement than a dozen small ones.
- Plant in Masses: Avoid the "one of everything" look, which can feel spotty and amateur. Instead, group the same plant variety together in drifts of 3, 5, or 7. This creates bold, cohesive blocks of color and texture that guide the eye and feel intentional.
- Finish with Fresh Mulch: Never underestimate the power of a fresh layer of mulch. A 2-3 inch layer instantly unifies your planting beds, smothers weeds, and gives the entire yard a clean, finished look for a relatively low cost. It’s the final touch that pulls it all together.
How Do Tools Like AI Actually Help My DIY Project?
AI visualization tools have become a huge asset for DIYers because they take the expensive guesswork out of the equation. It's one thing to read about a "Modern" or "Cottage" style, but it's another thing entirely to see how it will actually look on your property.
You can upload a photo of your own home and instantly see photorealistic renderings in a dozen different styles. This is invaluable for confirming your vision—or realizing it's not quite right—before you spend a single dollar on materials or labor. It’s like having a design consultant on call, 24/7.
Many of these tools, like Curb Appeal AI, also incorporate your climate data to suggest plants that will genuinely thrive in your area, helping you sidestep those costly planting mistakes. It gives you a risk-free sandbox to experiment with layouts and plant combinations until you find something you absolutely love.
Ready to see how different design styles would look on your own home? Curb Appeal AI uses advanced AI to generate photorealistic landscape designs in seconds, tailored to your property and climate. Stop guessing and start visualizing today at Curb Appeal AI.


