Your Guide to Flawless Backyard Landscape Design Plans
A solid backyard landscape design plan is your single most important tool for turning a patch of grass into a personal oasis. It’s the blueprint that maps out everything—from where the patio goes and what plants will thrive, to how the lighting will set the mood after sunset. Without one, you're essentially guessing, which can lead to costly mistakes and a space that just doesn't feel right. A good plan, on the other hand, ensures the final result is beautiful, functional, and exactly what you dreamed of.
Bringing Your Backyard Vision to Life
Think about stepping outside into a space that truly feels like an extension of your home. It’s not just about a few flowers here and there; it’s about creating a personal retreat for relaxing, entertaining, and enjoying nature. A lot of homeowners get stuck at the starting line, intimidated by the budget or worried they’ll make a wrong move. My goal here is to pull back the curtain on the design process, giving you clear, practical steps to make your vision a reality.
The whole journey really boils down to a simple, logical flow. This is how pros approach it, moving from the big idea to the final build.
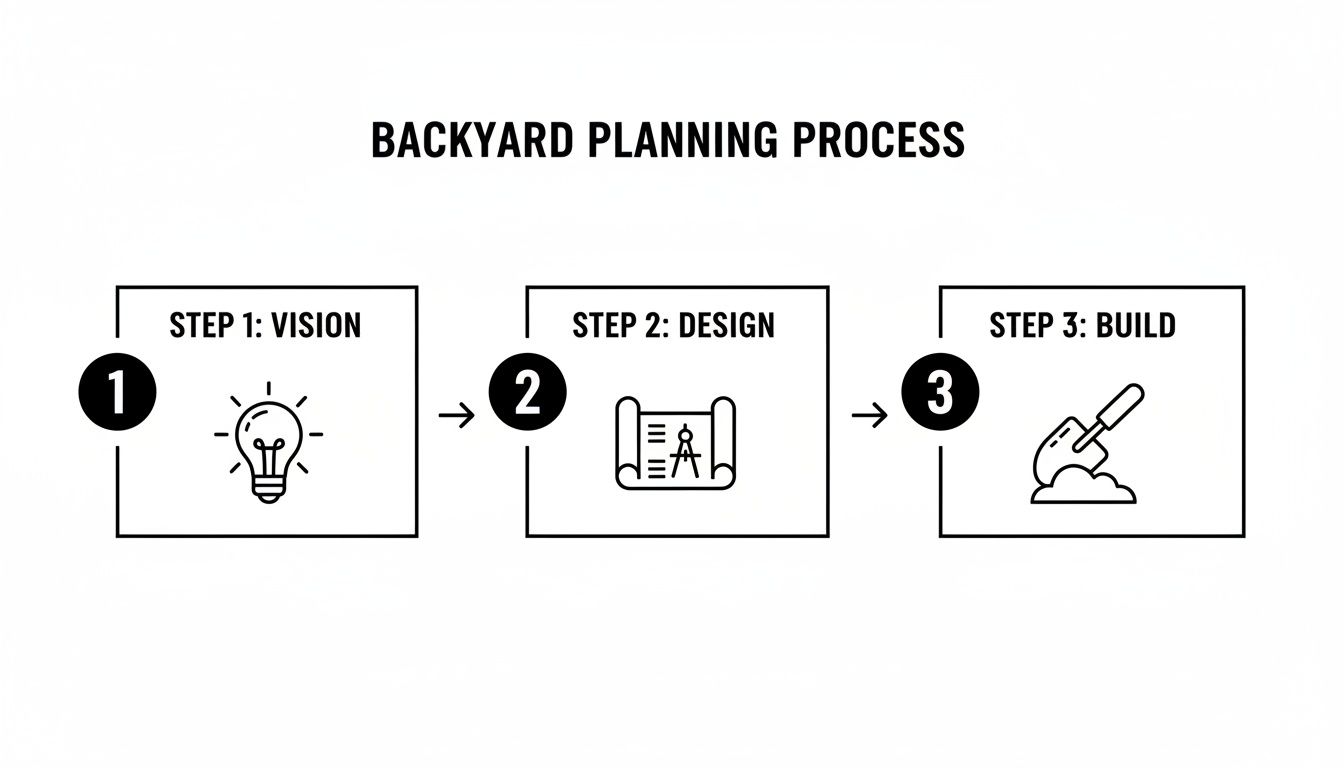
As you can see, every great backyard starts with a creative vision before moving into a detailed design. Only then does the building begin. This structure is what guarantees a thoughtful, well-executed outcome.
To get started, here's a high-level look at the core stages you'll be working through. Think of this as your project's main blueprint.
Your Backyard Landscape Design Plan Blueprint
| Stage | Key Objective | Primary Activities |
|---|---|---|
| 1. Site Assessment & Vision | Understand your space and define what you want. | Measure the yard, note sun/shade patterns, identify existing features, and create a wish list. |
| 2. Conceptual Design | Explore layout ideas and aesthetic styles. | Sketch bubble diagrams, gather inspiration images, and create a basic layout for key areas. |
| 3. Detailed Planning | Finalize all specific elements of the design. | Select specific plants and materials, design hardscapes, and plan for irrigation and lighting. |
| 4. Budgeting & Phasing | Create a realistic financial plan. | Get cost estimates for materials and labor, and break the project into manageable phases if needed. |
| 5. Visualization & Handoff | Bring the plan to life visually for final approval. | Produce detailed drawings or photorealistic renders; prepare a package for contractors. |
With these stages in mind, you can tackle the process one step at a time, making it far less overwhelming.
The Power of a Good Plan
A detailed plan is more than just a pretty drawing. It’s the ultimate communication tool between you, your family, and any contractors you bring on board. It gets everyone on the same page, which is crucial for avoiding the kind of misunderstandings that blow up budgets and schedules.
Frankly, a solid plan forces you to think through every detail before a single shovel hits the dirt. This proactive thinking helps you catch potential problems when they're still easy—and cheap—to fix. For example, planning your garden beds and irrigation system at the same time ensures you're watering efficiently. Mapping out lighting from the start can completely change the vibe of your yard at night.
A well-developed landscape plan is the single most important investment you can make in your outdoor project. It provides clarity, sets expectations, and ultimately saves you time and money by preventing impulsive decisions and rework.
Bridging Imagination and Reality
One of the toughest parts of any design project is trying to picture how a 2D sketch will look and feel in your actual yard. This is where technology has become a game-changer. AI-powered tools like Curb Appeal AI let you upload a photo of your current backyard and see it transformed with photorealistic renderings in different styles.
Want to see what a sleek Modern design looks like? Or maybe a lush Cottage garden or a water-wise Xeriscape? You can cycle through concepts instantly, without any commitment. It makes it so much easier to land on a plan that truly clicks with your personal style.
This ability to visualize the end result empowers you to create a design that not only boosts your property value but, more importantly, enhances your everyday life. For more inspiration, check out the different styles in our guide to backyard landscaping ideas. It’s all part of a complete roadmap designed to give you confidence from that first spark of an idea to the final, beautiful space you’ll enjoy for years.
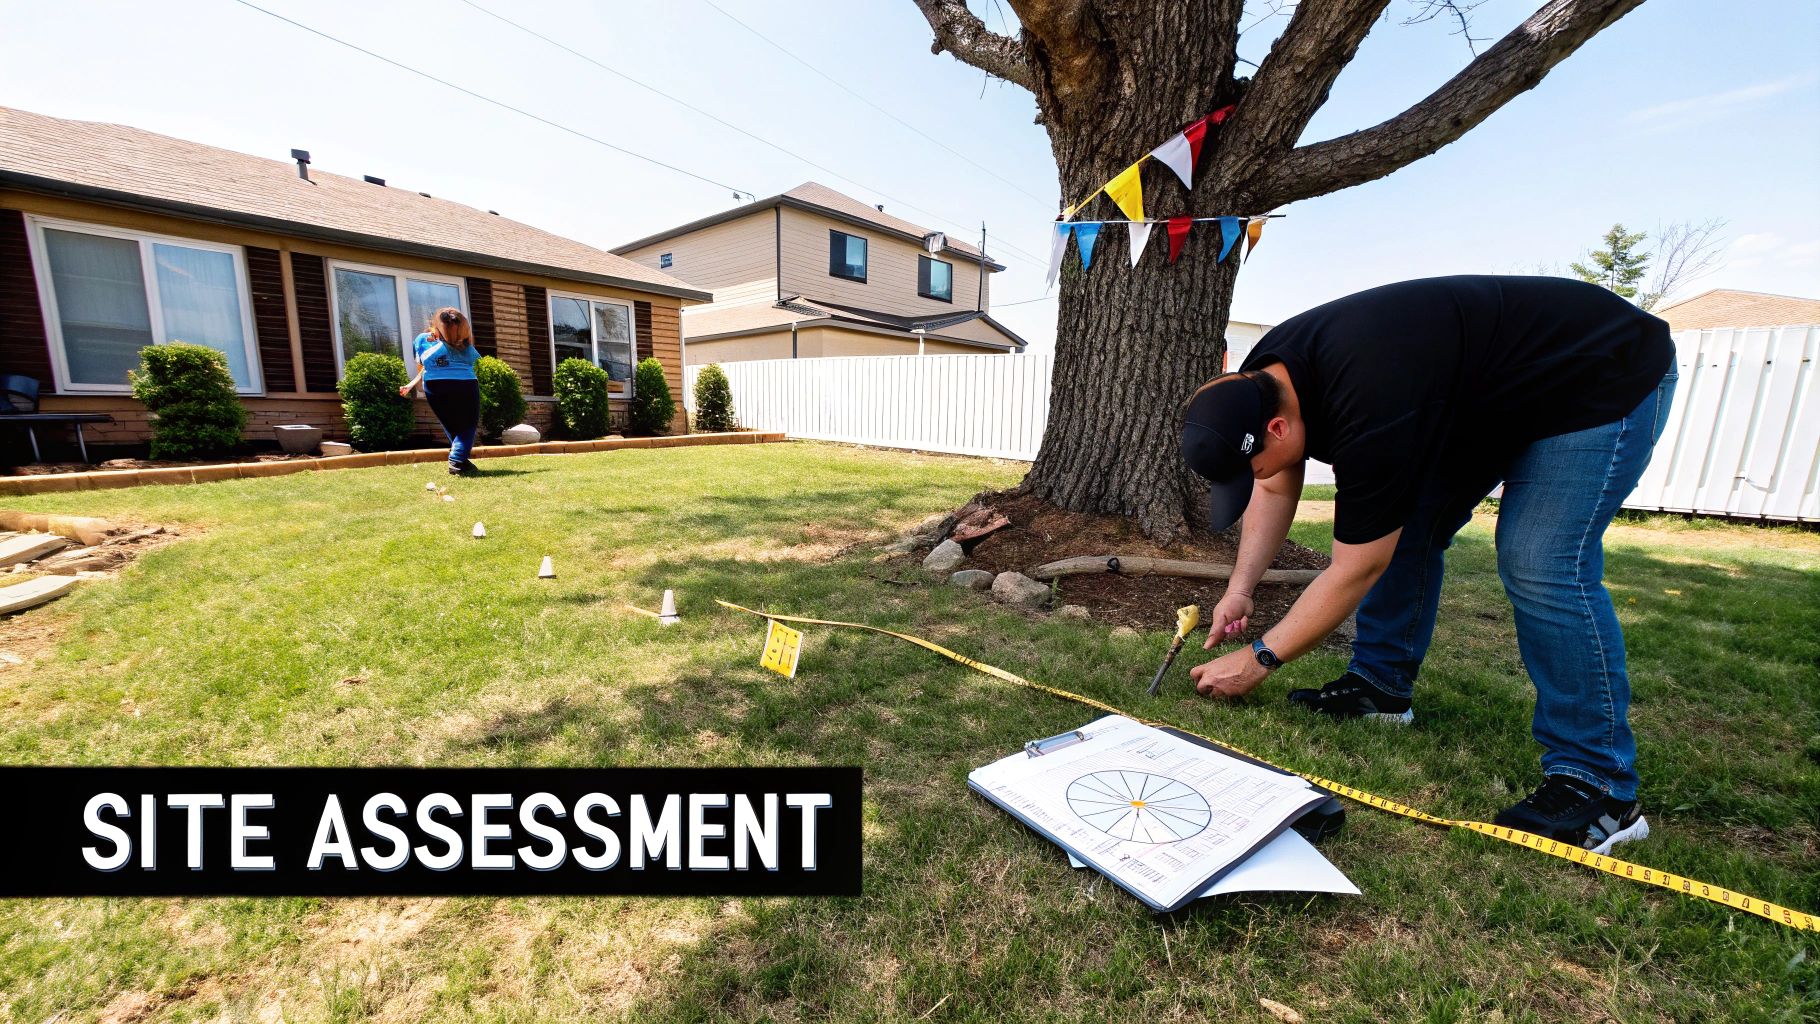
It All Starts with a Smart Site Assessment
Every truly great backyard design begins not with a bold idea, but with a quiet, careful look at what you’re starting with. Before you can dream up the perfect outdoor escape, you have to get to know the canvas you'll be working on. This initial assessment is, without a doubt, the most important step in creating a plan that’s not just beautiful, but one that actually works.
I’ve seen it time and time again—people skip this part and jump straight to the fun stuff, only to face disappointment later. That's how you get sun-loving flowers wilting in a shady corner or a beautiful new patio that turns into a pond every time it rains. A solid site assessment ensures your design works with your property, not against it.
Mapping Out What You Have
First things first, you need to document the reality of your space. You don't need fancy surveying gear for this. A measuring tape, some graph paper, and a sharp eye are all you need to create a base map for your backyard landscape design plans.
Start by measuring the perimeter of your yard and drawing it to scale. Then, begin adding the fixed elements—the things that aren't going anywhere and will shape every decision you make.
- Existing Structures: Pinpoint your house on the map, making sure to mark where the doors and windows are. Add any sheds, decks, or existing patios.
- Permanent Features: Note the location of any mature trees you plan to keep, large boulders, or significant slopes in the terrain.
- Utility Lines: This one’s a biggie. Find and map all utility access points—spigots, electrical outlets, and especially the location of septic tanks or underground lines. Ignoring these can cause massive headaches down the road.
Think of your base map as the command center for your entire project. It takes your abstract ideas and grounds them in reality, showing you exactly what you have to work with. It'll highlight both your yard's best features and its biggest challenges.
With the "hard" features mapped out, it's time to dig into the environmental factors that will ultimately decide what can grow and thrive in your backyard.
Understanding Your Yard's Unique Environment
Every backyard has its own microclimate, a specific blend of sun, soil, and water that will heavily influence your design. Documenting these elements is just as critical as measuring the physical space.
It’s a bit like getting to know a person; you have to understand their quirks and needs before you can build a good relationship. Your yard is no different.
Charting the Sun’s Journey
One of the most valuable things you can do is create a simple sun map. Just watch your yard at different times of the day—morning, noon, and late afternoon—and sketch the patterns of light and shadow right onto your base map.
- Full Sun: These are the spots that get 6 or more hours of direct sunlight.
- Partial Shade: Locations that get 3 to 6 hours of sun, often filtered through trees.
- Full Shade: Areas that see less than 3 hours of direct sunlight.
This simple diagram will become your go-to guide for everything, from finding the perfect spot for a vegetable garden (which demands full sun) to deciding where to plant those shade-loving Hostas.
Getting to Know Your Soil and Drainage
Now, it's time to get your hands dirty. Dig a few small holes in different parts of the yard. Does the soil feel sandy and loose, or is it a heavy clay that clumps in your hand? A simple home soil test kit can give you the scoop on its pH and nutrient levels—invaluable info for choosing plants.
After the next heavy rain, take a walk outside and see where water pools. These are your low spots with poor drainage, and they might need a special solution like a French drain or a rain garden.
This detailed analysis might feel a bit tedious, but it’s the bedrock of a successful project. The insights you gather here will inform every single decision you make later, from which plants you buy to where you place your patio. While we're focused on the backyard here, these core principles are universal. You can see more on how they apply in our guide on how to design a front yard landscape.
From Site Plan to Style: Defining Your Backyard's Personality
Once you've got the lay of the land—the measurements, the sun patterns, the problem spots—it's time for the fun part. This is where you get to dream. You're not just designing a yard; you're creating an extension of your home, a place that reflects your personality and how you want to live.
Choosing a design style is about setting a mood. It’s the difference between a sleek, modern oasis for cocktails and a rambling, romantic garden perfect for a lazy Sunday with a book.
This step can feel a little overwhelming, but let's break it down. Start by thinking about the overall feeling you're after. What’s the vibe?
Finding Your Landscape Style
Look at your house. Its architecture is your biggest clue. A stark, modern home just sings when paired with clean lines and structured plantings. On the other hand, a classic cottage-style house is the perfect canvas for a more free-flowing, informal garden.
Here are a few popular styles to get the ideas flowing:
- Modern: Think geometric shapes, a minimalist color scheme, and a strong sense of order. This style often uses materials like smooth concrete, metal, and dark wood, with bold plantings like sculptural ornamental grasses or tightly clipped boxwoods.
- Cottage: The complete opposite of modern. This style is all about romantic, informal abundance. Cottage gardens are a joyful jumble of flowering perennials, fragrant herbs, and climbing roses. Paths meander, and materials like old brick and natural stone feel essential.
- Xeriscape: Don’t mistake this for "zero-scape." A smart choice for dry climates, xeriscaping is about creating a beautiful, thriving garden with minimal water. It relies on drought-tolerant native plants, gravel mulches, and stonework to create a space rich in color and texture.
We're seeing a huge shift toward more natural, organic spaces. Requests for lush cottage gardens have skyrocketed, seeing a 100% increase as people crave their own personal paradise. This trend also leans into natural materials—demand for gravel and cobblestone pavers is up 25% and 50%, respectively. And it seems we all want to play more, too. Pergolas and even slides are seeing 40% and 85% jumps in requests as we build outdoor zones for family time. You can dive deeper into these outdoor living trends in recent industry reports.
A Pro Tip: The best style for your backyard is one that matches your lifestyle, especially how much time you really have for maintenance. A pristine modern garden requires a different kind of upkeep than a wild-at-heart cottage garden. Be honest with yourself about your long-term commitment.
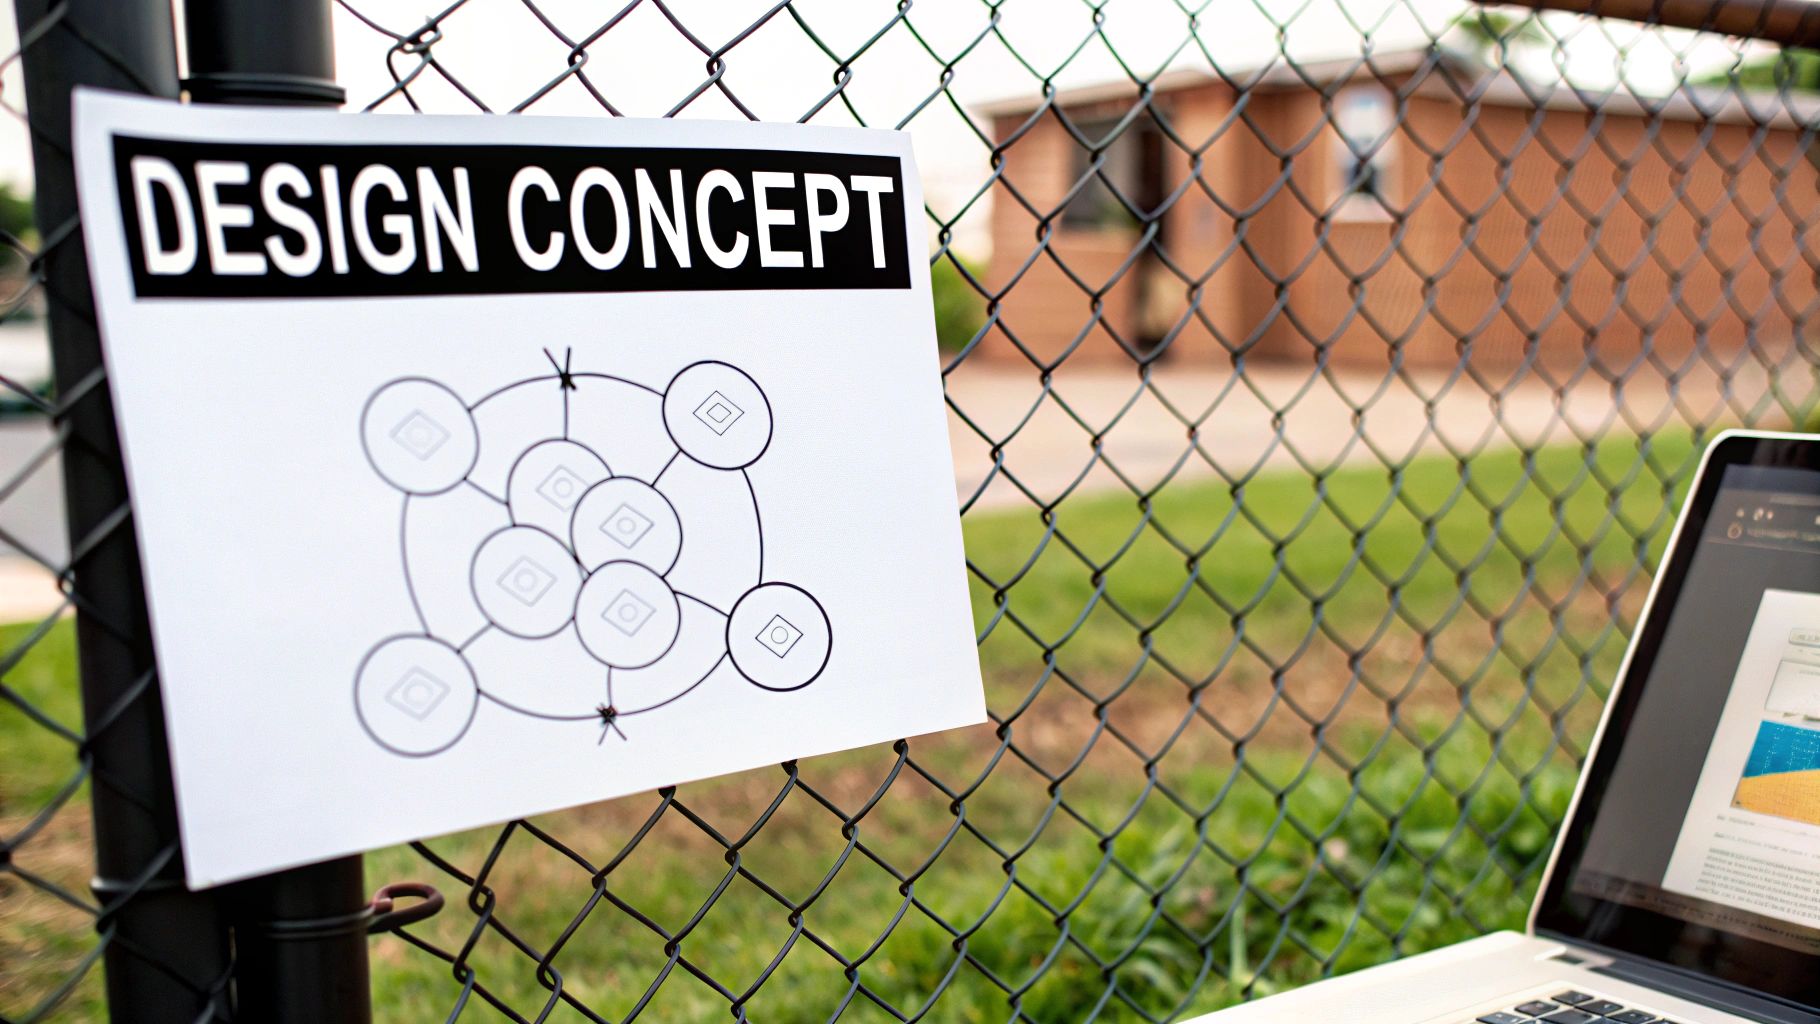
From Big Ideas to a Functional Layout
With a style in mind, it's time to think about flow and function. Before you fall in love with a specific plant or paver, you need to map out where everything will happen. The absolute best way to start is with a bubble diagram.
It's a quick, no-pressure sketch you draw right over your site plan. Just draw circles or "bubbles" to represent the different activities you want to do in your yard. Forget straight lines and perfect measurements for now—this is all about figuring out how the space connects.
Your bubbles might look something like this:
- A dining area bubble right off the back door for easy trips to the kitchen.
- A lounge space bubble placed to catch the perfect afternoon sun.
- A kids' play zone on a flat, soft patch of lawn.
- A utility area bubble for the compost bin or shed, tucked neatly out of sight.
This simple exercise is a game-changer. It helps you see how people will move through the yard and lets you experiment with different arrangements until it feels just right.
Using AI to Actually See Your Vision
Let's be real—one of the hardest parts of this whole process is imagining what it will all look like. A bubble diagram nails the function, but what about the feel? This is where new technology can make a world of difference.
Instead of guessing, you can use an AI platform like Curb Appeal AI to take the abstract and make it real. You simply upload a photo of your backyard as it is now, pick a style you're curious about—like "Modern" or "Cottage"—and it generates photorealistic concepts in moments. We're not talking about a crude sketch; these are clear, inspiring pictures of what your space could become.
This is like test-driving different designs for your yard. You can instantly see if a Xeriscape design clashes with your house or compare how a tropical theme feels versus a traditional one. Seeing these high-quality visuals makes it so much easier to refine your ideas and move forward with a plan you know you'll love.
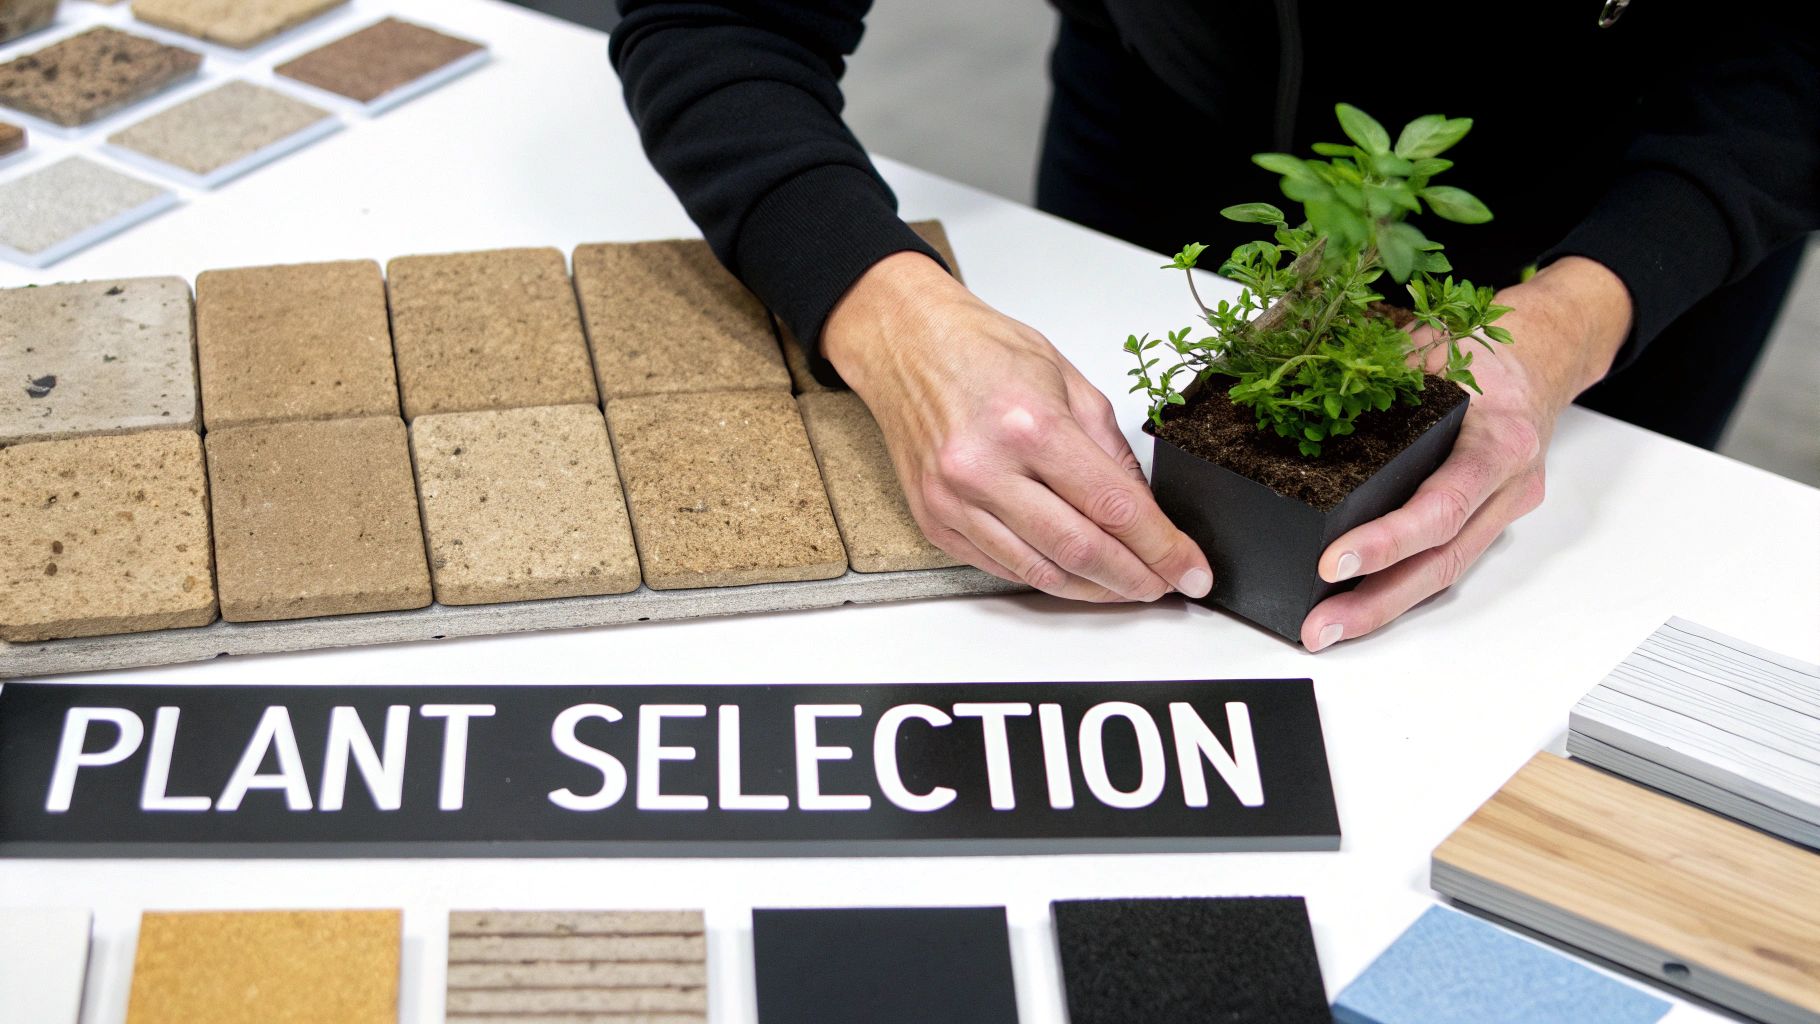
Choosing Plants and Materials That Last
Once you’ve nailed down your style and roughed out the different zones in your yard, it’s time to get into the fun stuff: picking the actual plants and materials. These are the building blocks that bring your design to life. They dictate the look, the feel, and—crucially—how much work you’ll be doing down the road. This is where smart, sustainable choices separate a pretty design from a pretty design that actually thrives.
I’ve seen it a hundred times: a homeowner falls in love with some exotic-looking plant at the nursery, brings it home, and then watches it slowly give up. Why? It was never meant for their climate. Getting this part right is all about working with your environment, not against it.
Work With Your Climate, Not Against It
The single most important piece of information for choosing plants is your USDA Plant Hardiness Zone. It sounds technical, but it's really just a map that tells you which plants can survive the coldest winter temperatures in your specific area. Trying to grow something outside its zone isn't a calculated risk; it's a gamble you’ll almost always lose.
Your hardiness zone isn't a suggestion—it's the fundamental rule for building a resilient garden. Choosing plants adapted to your zone is the first step toward a landscape that works with nature, saving you a ton of time, money, and heartache.
Beyond just the zone, you need to think about those microclimates you found during your initial site assessment. That sunny patch against the south-facing brick wall is a world away from the cool, damp shade behind your garage. This brings us to the golden rule of planting design: right plant, right place.
- Plan for Mature Size: That cute little shrub might look perfect today, but what happens in five years? Will it be blocking a window or swallowing a walkway? Always design for its full-grown size.
- Group by Water Needs: Don't create a maintenance nightmare by putting thirsty flowers right next to plants that prefer to stay dry. Grouping plants with similar water needs just makes sense. For some water-wise inspiration, check out our guide on drought-tolerant landscaping ideas.
- Respect the Sun (or Lack Thereof): A sun-worshipping perennial will just get leggy and sad in deep shade, while a delicate fern will get absolutely scorched in the direct afternoon sun.
This is one area where modern tools like Curb Appeal AI really shine. When you input your location, the platform automatically filters its plant library to show you only what’s appropriate for your hardiness zone. It takes the guesswork right out of the equation.
Selecting Hardscape Materials for Durability and Style
Now for the hardscaping—the non-living elements like patios, walkways, and retaining walls that form the skeleton of your design. The materials you choose here have a massive impact on your budget and the overall vibe of the space.
The landscaping industry is huge, with the market expected to hit $201.9 billion by 2034. We're seeing some clear trends in what people want for their backyards. For instance, 40% of homeowners are asking for pergolas, and there's a growing interest in sustainable choices like lawn removal (13%) and artificial turf (24%). This shift underscores why picking durable, long-lasting materials is so important.
So, let's break down some of the most common options for patios and walkways.
Pavers vs. Natural Stone vs. Wood
| Material | Average Cost (per sq. ft.) | Durability & Lifespan | Maintenance Needs |
|---|---|---|---|
| Concrete Pavers | $8 - $15 | Very durable, 50+ years | Low; occasional sweeping, spot cleaning, and re-sanding joints every few years. |
| Natural Stone | $15 - $35+ | Extremely durable, 100+ years | Very low; sometimes needs sealing to prevent stains. |
| Wood Decking | $20 - $50+ | 10-25 years (varies by wood) | High; requires annual cleaning, staining, or sealing to prevent rot and splinters. |
Your final choice will come down to a balance of cost, looks, and how much upkeep you're willing to commit to. Pavers are a fantastic, versatile middle ground. Natural stone offers timeless beauty and will outlive all of us. Wood decking brings a wonderful warmth and is a great solution for sloped yards, but it definitely demands the most attention.
By thinking through both your plants and your hardscape materials this carefully, you're setting yourself up for a backyard that doesn't just look amazing on day one, but one that matures beautifully for years to come.
Getting Technical: Planning Your Hardscape, Lighting, and Irrigation
A stunning backyard is so much more than just pretty plants and cool furniture. The real magic—the stuff that makes your space last for decades—is the work you don't see. I'm talking about the solid base under your patio, the smart irrigation that keeps your garden lush without wasting water, and the lighting that brings the whole scene to life after dark.
This is the "bones" of your backyard.
Thinking through these technical details right from the start is one of the biggest favors you can do for your future self. It's infinitely easier to run electrical conduit for lights before you lay the patio, not after you've already set the last stone. Planning these systems together is the secret to a design that feels seamless and works perfectly.
Building Hardscapes That Actually Last
Your patios, walkways, and retaining walls are the foundation of your outdoor living space. And just like the foundation of a house, their strength depends entirely on what’s underneath. I can’t tell you how many times I’ve seen a beautiful patio fail because someone skimped on the base prep. It’s the #1 reason patios sink and walkways turn into tripping hazards.
A proper base for pavers or flagstone isn't complicated, but it's non-negotiable. It means digging out several inches of soil and putting down a compacted gravel base, followed by a layer of sand. This creates a stable platform that drains well and can handle the freeze-thaw cycles of winter without heaving.
If you're planning bigger structures like a deck or pergola, you have to think about concrete footings that go below your local frost line. This anchors the structure so it doesn’t shift and become unstable. A quick check of your local building codes will tell you exactly how deep you need to go.
Designing a Smarter Irrigation System
A well-planned irrigation system is your ticket to a healthy landscape and a lower water bill. The entire goal is to get the right amount of water exactly where the plants need it, without spraying the sidewalk. It's no surprise that 10 million smart irrigation systems have been installed globally—they can cut water use by up to 30%.
Your design plans should map out different irrigation zones based on what you're planting.
- Drip Irrigation: For garden beds, trees, and shrubs, this is the gold standard. It slowly drips water right at the root zone, which means less evaporation and healthier leaves (since they stay dry).
- Spray Sprinklers: These are best for lawn areas. Modern sprinkler heads are highly adjustable, so you can dial in the spray pattern to get even coverage without watering the driveway.
- Smart Controllers: These are a game-changer. A Wi-Fi-enabled controller can automatically adjust watering schedules based on the local weather forecast, saving you water, time, and hassle.
A thoughtful irrigation plan isn't just a convenience; it's a critical component of a sustainable landscape. By zoning your system and using efficient methods like drip lines, you create a healthier garden while conserving a precious resource.
Lighting Your Landscape for Mood and Safety
Landscape lighting does two crucial jobs. First, it adds safety by making paths and steps visible. Second, it creates a gorgeous, magical ambiance that lets you enjoy your backyard long after the sun goes down. A well-lit space just feels more inviting.
The secret to professional-looking lighting is layering. Forget about one or two harsh floodlights. Instead, use a variety of low-voltage LED fixtures to create depth and highlight key features.
Here are a few techniques I use all the time:
- Path Lighting: Use low-profile fixtures to cast pools of light on walkways to guide the way safely.
- Uplighting: Place spotlights at the base of striking trees or architectural shrubs. It highlights their texture and creates dramatic focal points.
- Downlighting: This is one of my favorites. We install a fixture high up in a mature tree to cast soft, dappled shadows below, almost like natural moonlight.
- Hardscape Lighting: You can integrate subtle LED strip lights under stair treads, along the bottom of a seating wall, or under a countertop for a clean, modern look that’s also incredibly practical.
When you bake these technical systems into your backyard landscape design plans from day one, everything just works better together. This holistic approach is what elevates a yard from being merely "finished" to being a durable, efficient, and truly enchanting outdoor sanctuary.
Budgeting and Preparing for Installation
You’ve made it. With a detailed visual plan in hand, you're at that final, thrilling stage where ideas get turned into reality. This is where the blueprint meets the budget, and you bring in the right pros to bring your vision to life. A smart approach here is what makes the difference between a smooth, predictable project and a stressful one.
Let’s be honest, talking about money can be uncomfortable. But having a solid plan is the single best tool for getting a handle on costs. Without it, you can't get accurate quotes or even know what to ask for. Your detailed design is more than just a picture; it’s a powerful document that puts you in control of the project's finances.
Creating a Realistic Landscape Budget
The first question everyone asks is, "So, how much is this going to cost?" You may have heard the old rule of thumb to set aside 10-15% of your home's value for a big landscape overhaul. That’s a decent starting point, but the real cost is tied directly to the scope of your specific backyard landscape design plans.
To get a much clearer financial picture, break down the estimate into its core parts. This way, you can see exactly where the money is going and find places where you might be able to adjust.
- Hardscaping: This is almost always the biggest ticket item. Think patios, walkways, decks, retaining walls, and fire pits.
- Plantings: This bucket includes all your trees, shrubs, perennials, and the good-quality soil and amendments they need to thrive.
- Infrastructure: The "unseen" essentials like irrigation systems, drainage solutions, and the electrical work for landscape lighting.
- Labor: The cost for professional installation, which can easily account for 40-60% of the total project budget.
- Contingency Fund: This one is non-negotiable. Always, always set aside an extra 10-20% for the unexpected.
Don't even think about skipping the contingency fund. It’s the buffer that keeps a small surprise—like discovering a buried utility line nobody knew about—from derailing your entire project. It's the difference between a minor hiccup and a major financial headache.
The Smart Strategy of Phasing Your Project
If the grand total makes you weak in the knees, remember you don't have to do it all at once. Phasing is a fantastic strategy for making your dream backyard a reality without breaking the bank. It’s all about breaking your master plan into smaller, logical chunks that you can tackle over several seasons or even years as your budget allows.
For example, a logical phased approach might look something like this:
- Phase One: Get the foundational hardscaping done first—the patio and main walkways. This work is the most disruptive, so it's best to get it out of the way.
- Phase Two: Bring in the larger trees and shrubs. This gives them a head start on getting established and starting to mature.
- Phase Three: Fill in the details, like adding perennial beds, installing the landscape lighting, and hooking up the irrigation system.
This method lets you enjoy parts of your new yard much sooner while spreading out the financial hit. Best of all, because you're working from a complete design plan, you can be confident that each phase will build perfectly on the last, creating a cohesive, unified space in the end.
Handing Off Your Plan to a Contractor
Hiring the right contractor is absolutely critical, and your visual plan is the key to making that partnership a success. A vague idea only gets you a vague quote. A photorealistic render, on the other hand, leaves no room for guesswork. When a contractor can see precisely what you want, right down to the specific paver style and plant varieties, they can give you a much more accurate and detailed bid.
This is where a tool like Curb Appeal AI really shines. When you hand a contractor a high-quality visual from the platform, it accomplishes several things at once:
- Ensures Everyone is on the Same Page: It drastically reduces the risk of miscommunication, which is one of the biggest causes of project delays and budget overruns.
- Facilitates Accurate Bidding: Contractors can price out materials and labor with confidence, which means you get more competitive and realistic quotes.
- Acts as a Visual Contract: The render becomes a clear reference point for everyone during the installation, ensuring the finished product matches the design you approved.
This investment in clear visualization is part of a much larger trend. The global garden landscape design market, valued at $150 billion in 2025, is projected to soar to $250 billion by 2033. This boom is driven by homeowners who want custom outdoor spaces that not only look incredible but also boost property values by 10-20% and can deliver an ROI of up to 500% on features like patios. AI-driven platforms that produce clear, realistic renders are becoming essential for both homeowners and the pros they hire. You can dig into the full market trends and projections to learn more.
By budgeting methodically, considering a phased approach, and using a crystal-clear visual plan to communicate with professionals, you’re setting yourself up for a successful and stress-free installation. You can move forward with confidence, knowing you’ve put in the work to turn your beautiful design into a lasting reality.
Common Backyard Landscape Design Questions
Diving into a backyard project always sparks a lot of questions. I get them all the time. Thinking about the budget, how long it'll take, and whether you can tackle the design yourself is a huge part of the process. Let's walk through some of the most common questions I hear, so you can move forward with confidence.
How Much Should I Budget for My Backyard Landscape?
This is the big one, isn't it? A classic rule of thumb is to set aside 10-15% of your home's value for a full-blown landscape project. But honestly, that’s just a starting point. The real cost comes down to what you want to do and where you live.
A simple paver patio, for instance, might run you anywhere from $5,000 to $15,000. If you're planning a complete overhaul with new plants, hardscaping, a sprinkler system, and outdoor lighting, you could easily be looking at $20,000 or more. The best approach is to figure out what's most important to you and start there.
Pro Tip: Don't feel like you have to do everything at once. Phasing the project is a fantastic way to manage costs. Get the essential hardscaping done this year, then maybe add the planting beds and lighting next season. And whatever you do, build a 10-15% contingency fund into your budget. Trust me, something unexpected always comes up.
Can I Create a Professional-Looking Design Myself?
You absolutely can. Creating a high-quality design is more achievable for homeowners now than ever before, as long as you have the right approach and a little help from modern tools. The key is to think like a pro: start with a solid site assessment, get crystal clear on your goals, and choose a style that you can stick with.
Historically, the toughest part for DIY designers was visualizing the final result. It's hard to look at a simple sketch and imagine how it will actually feel to stand in that space. This is where technology has completely changed the game.
Tools like AI landscape designers can take a photo of your yard and generate realistic mockups in various styles. They can even suggest plants that will actually thrive in your climate. This helps you build a really solid, professional-grade plan without the price tag of a traditional designer. That said, if your project involves major earth-moving, tricky drainage issues, or big structures, it's always smart to bring in an expert for a consultation.
How Long Does a Backyard Makeover Take?
The timeline really depends on how ambitious you're getting. Planting a few new flower beds over a weekend is a world away from a full-scale renovation.
To give you a rough idea of what to expect:
- New Patio or Deck: This typically takes one to two weeks, assuming the weather cooperates and the design isn't overly complex.
- Major Planting Project: For smaller garden beds, this might take a few days. If you're talking about large-scale planting with mature trees, plan on a week or more.
- The Full Overhaul: A project that pulls everything together—hardscaping, irrigation, lighting, and planting—could take anywhere from four to eight weeks, and sometimes longer.
Always remember that things like bad weather, delays in material delivery, and your contractor's schedule can stretch things out. Having a detailed backyard landscape design plan is your single best tool for setting a realistic schedule and keeping everyone on the same page from day one.
Ready to stop guessing and start visualizing? With Curb Appeal AI, you can upload a photo of your backyard and instantly generate stunning, photorealistic designs in dozens of styles. See exactly what works for your space before you ever break ground. Transform your vision into a workable plan today at https://www.curbappealai.co.


